No matter what you say, your gadgets are an integral part of your life. You don’t spend one day without using your computer or phone. Almost everything you need, starting from to-do lists to birthday reminders, is stored in your device. You customize pretty much every part of your phone to suit your needs, and this is where Tasker profiles comes in.
Table of Contents
What is Tasker?
Just like the name implies, Tasker is an app that helps execute the tasks you set. In other words, Tasker controls the tasks you set for a particular time and runs them based on specific contexts given by you. It merely follows your command. Using Tasker, if you’re new to it, can be quite tricky, here are a few taskers profiles that will ease things up for you. This article will provide you with a basic rundown on how to use Tasker and give you a general idea of what it can do and how it can make your life simpler.
Tasker’s UI
Before we get into how to make tasker profiles, you first need to know about the tabs present.
Once you open the app, you’ll notice four tabs on top of the interface:
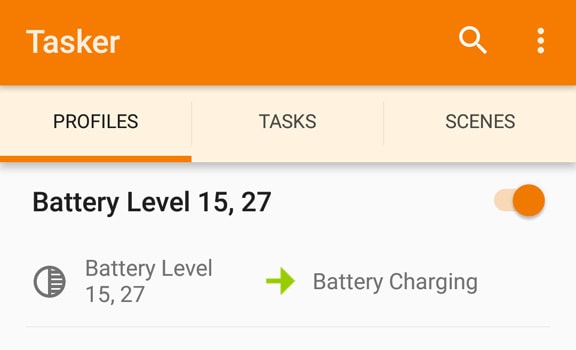
- Profiles section lets you create various profiles with proper contexts for the execution of an action.
- Tasks are a bunch of activities that may or may not be linked to the backgrounds.
- Scenes are used to customize pop-ups, menus, or add visual effects.
- Variables are used to access and transfer data within the system. As the word suggests, a variable is something that changes over time, like the date or battery power.
Tasks And Tasker Profiles
If you’re a beginner, it is advised that you start by creating a task before a profile. The job you set is the task your gadget performs for you. For your responsibility to run a set of conditions and triggers, have to be met, which happens when you set up a task profile, which brings us to the next segment.
Creating Tasker Profiles
The first thing you have to do after you open the app is to click on the Profiles tab. Choose the + icon in the bottom right corner and add your first context. As mentioned, a framework is a trigger due to which your profile activates and runs the task set by you.
As soon as you add your context, you’ll find six categories which are as follows:
- Application
- Day
- Event
- Location
- State
- Time
These mostly contain the triggers required for your profile. Once you select one of these triggers and your profile is created, you can long-press on the trigger you just selected and add the task of your choice or create a new one to add to it.
Application
Upon selecting this category, you’ll have the list of all your apps in front of you. Just choose the apps you want to set as the trigger for your task. The task will function when the apps are running, and if you select the ‘invert’ option, the job will run when the apps you’ve preferred aren’t operating. Remember that the apps must run or not run in the foreground, not background. After you’re done with this, click on the back button and turn on the accessibility permitting Tasker to see which apps are running.
Day
This category is used to set the date and time of your task execution. You can select ‘All,’ ‘Odd’, or ‘None,’ to select all days, odd days, or no days. You can also select more than one day for your task to run in. In the months’ category, you can choose which months your profile runs in and which months it doesn’t.
Event
This category has a large number of options to choose from. Its subcategories are as follows:
- Date/Time
- Display
- File
- Hardware
- Phone
- Plugin
- Power
- Sensor
- System
- Tasker
- UI
Each subcategory has an event. Going through them is tough work, so use the ‘filter’ option at the end of the menu to look for the facts of your choice. Once you’re done selecting your activity, add a few details for defining when you want your task to run. Here ‘when’ is not a particular time in a day but the time of an action that puts your responsibility into motion.
Location
When you select a specific location, the task set to these Tasker profiles activates itself when present within a certain radius of the area set by you. It can increase/decrease the volume of your phone or switch your phone off.
State
The only difference between the state and event category is that the state is a continuous process, and the event is a one-time occurrence. The task you set to a ‘state change’ will stop executing itself when the state changes. State also has subcategories:
- App
- Display
- Hardware
- Net
- Phone
- Plugin
- Power
- Sensor
- System
- Tasker
- Variables
Here too, you have to use ‘filters’ to find the specific state that you want. You have to specify the number of rules just like you did for the event category.
Time
It is very much like the location category but with more reliability. All you have to do is select the time ‘from’ when you want the task to run ‘to’ when you want the job to stop. Your responsibility can run in a specific time frame like it can increase/decrease your phone’s volume in the particular period set by you.
You can also set your task to operate every ‘x’ hours or minutes.
After you’ve selected the category of your choice, press the back button and name the profile and assign a task to it, and you’re all set.
It can take a while to get fluent in the Tasker profiles language. Don’t be intimidated. With time it becomes much more comfortable, and you can do super cool stuff with it. Just remember to devote time and explore the app and get used to its configuration. You want to make it easier for yourself. But is Tasker the one for you? You bet it is.